Configuring Google Workspace for SSO Learner Authentication
- Login to the Google Workspace Admin Console https://admin.google.com/.
- Select Apps.
- Select SAML apps.
- Click the Add App drop-down menu and select Add custom SAML app.
- Input a name of your choice for the app such as “Infosec Skills SSO” and click Continue.
- Click on the Download Metadata to save the xml file, then click Continue. You will need this file on a later step.

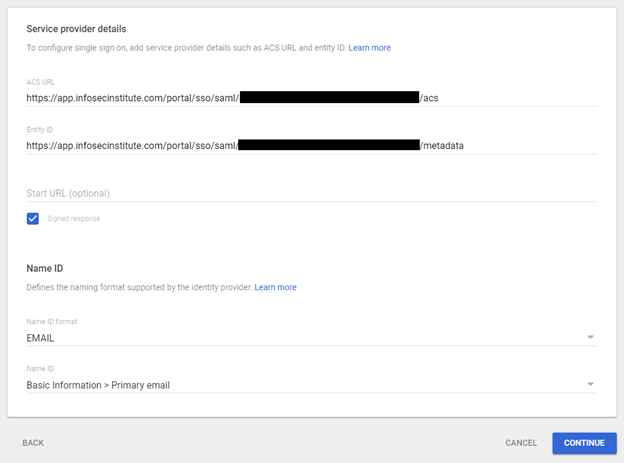
- On the Service provider details page, complete the following:
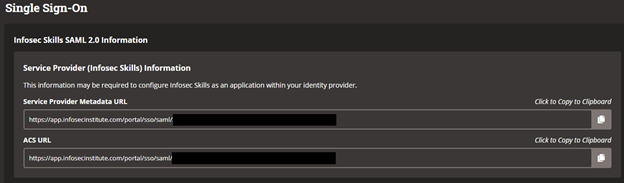
- Input the ACS URL: the ACS URL located on your Skills Teams Single Sign-On page.
- Input the Entity ID: the Service Provider Metadata URL located in Skills Teams Single Sign-On Page.
- Ensure that the “signed response” checkbox is checked.
- Change the Name ID format to “EMAIL”.
- Ensure that the Name ID is set to “Basic Information > Primary email”. Then click Continue.
8. On the Attributes page, click on Add Mapping to add the following three attributes, then click Finish.
| Google Directory attributes | App attributes |
|---|---|
| Primary email | |
| First name | first_name |
| Last name | last_name |

- Back on the main page of your new SSO app in Google Workspace, click on User access and select ON for everyone, then click Save.
- Open the GoogleIDPMetadata XML file that you downloaded earlier and copy the raw XML (we recommend opening with a web browser; right-click and “open with”).
- In your web browser, right-click on the metadata and select “view page source”. Copy the code.

- Paste the copied code into the below raw XML text box in the Infosec Skills Teams Single-Sign On page (https://app.infosecinstitute.com/portal/teams/sso/settings).
- Then click on the green Enable button on the right to save the settings.